This 1950s US Navy training film explaining how simple mechanisms can by used to perform mathematical functions. I particularly liked the tangent cams and barrel cams.
Vultures Picnic and Diesel Generators
Vultures Picnic is the latest work of investigative reporting by multi-award-winning journalist Greg Palast. I will admit to being ill-disposed to this book as I find Palast’s prose style teeth-grindingly irritating. The book is couched more in the style of a travelogue mixed with a murder mystery. If you like your journalism dry and well-referenced this book is not for you.
I have no idea whether the criminal and political conspiracies laid out in the book are accurate. I’ve seen some of the same claims made by other journalists — usually much better sourced — so I’ve no reason to believe that Palast is making anything up. His nose for politics and money seems good, but he seems to have a blind-spot when it comes to technical issues. He often seems to rely on a single source that tells him what he wants and never mind the evidence.
In one particularly jaw-dropping chapter Palast makes the bold claim that the emergency diesel generators (EDGs) on all nuclear power stations can’t work. To quote from page 343..
In other words, the diesels are junk, are crap, are not capable of getting up to full power in seconds, then run continuously for days. They’re decorations attached to nuclear plants so people will think these radioactive tea kettles are safe.
The nice thing about this claim is that it’s easily testable. Has a nuclear power station ever run on its EDGs after losing off-site power? As it happens, yes.
In August 2011 The North Anna plant in Virginia was hit by an earthquake just off the coast. This event caused both its reactors to go into emergency shutdown. As well as triggering this shutdown the quake also took out the offsite power. All four EDGs at North Anna sprang into life and supplied power to the emergency systems until offsite power was restored; exactly as they were designed to, and exactly as Greg Palast says they can’t.
So why does Palast make this claim? Well he has history with EDGs. He was part of the legal team that charged LILCO with conspiracy charges around the building of Shoreham Nuclear Power Station. The corrupt and incompetent LILCO bought prototype, untested generators from a company called Delaval rather than proven generators that would have cost 5% more. These three underspecified generators promptly failed on testing and LILCO were forced to buy the more expensive generators.
Now, I can see how that experience could sour one on the nuclear industry, but it’s a long way from “these three generators failed” to “all generators must fail”. This is where Palast’s inside man appears. There is a long conversation with an unnamed engineer wherein Palast is informed that starting EDGs to full power in seconds puts lots of mechanical strain on them and they aren’t designed to deal with it. The engineer makes the point that the same diesels when used to pull trains or power ships are generally warmed up slowly. All of which is true, but beside the point. EDGs are required to run for hours not years, so shortening their operational life a bit by hard-starting them is a sensible trade-off.
If you are particularly cynical you might be thinking that they got lucky at North Anna. How do we know other generators would perform as well? Because the NRC requires you to actually test that they work.
For the purposes of SR 3.8.1.2 and SR 3.8.1.7 testing, the DGs are started from standby conditions. Standby conditions for a DG mean the diesel engine coolant and oil are being continuously circulated and temperature is being maintained consistent with manufacturer recommendations.[ In order to reduce stress and wear on diesel engines, the DG manufacturers recommend a modified start in which the starting speed of DGs is limited, warmup is limited to this lower speed, and the DGs are gradually accelerated to synchronous speed prior to loading. This is the intent of Note 2, which is only applicable when such modified start procedures are recommended by the manufacturer.
SR 3.8.1.7 requires that, at a 184 day Frequency, the DG starts from standby conditions and achieves required voltage and frequency within 10 seconds. The 10 second start requirement supports the assumptions of the design basis LOCA analysis in the FSAR, Chapter [15] (Ref. 5). ]The 10 second start requirement is not applicable to SR 3.8.1.2 (see Note 2) when a modified start procedure as described above is used. If a modified start is not used, 10 second start requirement of SR 3.8.1.7 applies.Since SR 3.8.1.7 requires a 10 second start, it is more restrictive than SR 3.8.1.2, and it may be performed in lieu of SR 3.8.1.2.In addition to the SR requirements, the time for the DG to reach steady state operation, unless the modified DG start method is employed, is periodically monitored and the trend evaluated to identify degradation of governor and voltage regulator performance.
Got that? Every 31 days do a gentle start of the EDG (if the manufacturer recommends it, else do a hard start) and every 184 days hard-start the EDGs to prove they can get to full power in 10 seconds. The only difference between the hard-start test and an emergency is that you are allowed to run the oil and lube pumps beforehand to reduce the wear on the engine.
If you have a problem with that testing regime take it up with the NRC, and don’t believe everything Greg Palast tells you.
References:
Giles Fraser at Westminster Skeptics
via Google+
Thoughts on Dr Giles Fraser at Westminster Skeptics:
http://westminster.skepticsinthepub.org/Event.aspx/1099/Being-suspicious-about-the-Skeptics
He is a great speaker. It’s easy to see why he rose to the position of Canon of St Pauls.
His talk was roughly based around the idea that an evidence-based approach was not helpful in the case of romantic love.
He needs to spend some quality time with the works of Karl Popper on the nature of evidence and the scientific method. Descartes is all very well but there has actually been significant work done since then.
Othello is interesting, but as a work of fiction he doesn’t even rise to the status of anecdote. If you are trying to convince a room full of skeptics that evidence-based reasoning isn’t always helpful it would be nice if you presented some .. I don’t know .. evidence?
Love was repeatedly conflated with monogamy. With a group as diverse as the Westiminster Skeptics I bet not everyone would agree with that assertion. Except the assertion was never even properly made. Giles repeatedly admitted that he refused to define what Love even was. If we can’t even define the limits of what we are talking about then no useful discussion can occur.
It was a very good talk and the resulting discussion was one of the feistiest I’ve heard at #westskep but ultimately his refusal to define what he wanted to talk about moved him towards the usual kind of clumsy apologetics we’ve all heard before. A sort of loosely philosophical brand of special pleading.
This episode brought to you by the letter ‘beer’ and the number ‘too damn late’.
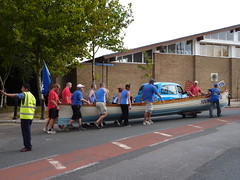
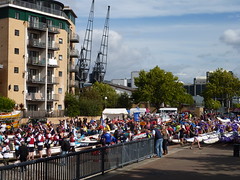
Great River Race
I found out the other day that something called the Great River Race was setting off from the Millwall Slipway which is only walking distance from my house. So on Saturday afternoon I wandered over shortly before the start to see what was going on.
When I first got there teams were still ferrying their boats across Westferry Road to slipway.
The staging area above the slipway was packed with teams and boats of all different kinds.
These Hawaiian Outriggers are some of the fastest boats in the race according to last years results.

Lots of boats beach on the tiny shoreline while they are waiting for their start time. Different classes of boats start in different batches.

Although getting up and down to the shore is quite a fearsome climb.

I knew very little about the race before I turned up so I was surprised by the variety of boats and crews on display. For example, apparently this is a Cornish Pilot Gig:

and this is a Dragonboat.

There were crews from abroad like these chaps from Rotterdam,

and local crews like Sisterhood from Hounslow.

And even some heavy metal fans.

By the time I left the only crew still waiting to launch were the Row2Recovery crew in their Transatlantic Four.

You can find the rest of my photos from the afternoon on my flickr account.
Westminster Skeptics: The Revolution Will Be Digitized
After being in London for nearly a year I’ve finally managed to make it to a Westminster Skeptics in the Pub meeting. I was rewarded with an entertaining and thought-provoking talk by crusading journalist Heather Brooke. Based on her new book it focused on journalism in the digital age with examples from the MPs expenses scandal and the on-going saga of WikiLeaks. The spirited Q&A that followed brought up a whole load of issues.
The key things that jumped out at me (in no particular order):
If we believe as a society that journalism is important for holding the powers that be to account, how are we going to pay for it? I have to say that I occasionally feel guilty about not subscribing to a daily newspaper, but then I remember that I really don’t want to pay for sports reporters and alternative health correspondents. What’s worse is that I’m an absolute news junky, so how does a news organisation turn someone like me into a customer? I have no answers here.
Something that came up a few times was the idea of journalists as filterers and synthesisers of information. The way way this was being described made me think of Librarians. This isn’t an insult, as a former denizen of academia I have had occasional dealings with real librarians; like Dragons they are of fearsome aspect, capable of deep magic and to be treated with the utmost respect. My gut feeling is that the real difference between a Librarian/Curator and a Journalist is narrative.
The issue of releasing redacted vs complete source material was circled around a few times. The whole business of redacted material bothers me quite a lot. Back when I had peripheral involvement in some medical data projects the topic of anonymisation of patient data was discussed quite a lot. If you anonymise clinical data properly you are allowed to store it for research purposes on networks that don’t meet the same security standards as the clinical network. The reason I mention this is that some research has been done on how much anonymous data you need before you can start identifying individuals. As I recall it needs rather less data that most people suppose. This makes makes the appropriate redaction of source material a difficult process. I’ll have to see if I can track down the papers I dimly remember on this subjects.
Which sadly brings us to the final question of the evening. Reading a book in an hour standing up in Waterstones and not buying it is not an indication of your intellectual prowess it’s an indication that you are an arse. Also, if you are going to insult the speaker please try to articulate an actual question. Accusations of hypocrisy, and mentioning that Julian Assange tried to kiss the speaker do not a cogent argument make.
Right, it’s a school night. I must be off. Looking forward very much to the next Westminster Skeptics.
This post brought to you by beer.
#edited for spelling and links
Health, Evidence and Economics
I was going to write a post about Fukushima today, but instead I ended up having a discussion about Evidence Based Medicine (EBM) and it’s intersection with free-market economics. This was precipated by Anne-Marie Cunningham sharing a couple of papers about EBM and the values implicit in it’s use. These are both from the ’90s, but should be read by anyone with an interest in the roots of the current round of NHS reforms.
Links to both the papers can be found in my G+ post on the issue.
With that I’ll leave you with a quote from Florence Nightingale: ‘I need not remind you that what we get into scrapes for is not for saying what nobody believes and everybody says but for saying what everybody believes and nobody says”.
Willing to pay for sync?
Matt Assay had an interesting post up on the Register today about Amazon’s kindle store outselling Apple’s ibooks. His thesis is that this is driven by the fact that Amazon has a much larger range of titles and that kindle will run and sync across lots of platforms.
It’s sometimes said that people won’t pay for sync, and that they don’t value choice. Kindle’s ebook sales compared to Apple’s iBook sales suggests otherwise. Syncing across different devices matters. Choice matters. The proof is in the sales figures.
Even given the weasel words and spin that are customarily embodied by corporate sales figures, I’m willing to believe that Amazon are selling a lot of more ebooks than apple. However I’m not entirely convinced that sync is the reason for that. Mr Assay’s assertion about the reasons for this difference in sales really amounts to a hypothesis. I am a happy Kindle user, and while I only represent a sample size of one, let’s see if my experience supports this hypothesis.
I finally jumped aboard the Kindle store when Amazon released the Kindle App for Android. I’d been waiting for the paperback release of The Fuller Memorandum by Charles Stross (I am a huge Stross fan). The reason I don’t buy hardbacks is because I just don’t have that much space to dedicate to one book in my tiny flat. Much as I’d like my own Library it’s not going to happen in this lifetime. So the availability of kindle on a device I already owned together with a kindle version of a book I really wanted to read sold me on the idea. At this point I figured the worst that could happen is I’d waste a few dollars if the reading experience wasn’t that great.
Reading on the small screen of my HTC Hero was remarkably easy; I devoured the book in a couple of sittings. Over the next few months I bought more books and enjoyed the fact that I didn’t have to buy yet another bookcase. I finally gave in and bought a Kindle this year so that I could take more books on holiday with me than I normally do, since the battery on the Kindle would last all week whereas my phone would barely last a day.
I almost never read the same book on both devices. The sync functionality goes unused. So let’s see how Mr Assay’s hypothesis does against my experience.
1) Kindle ebooks can be read on a lot of different platforms.
Check. It was Kindle’s availability on Android that first got me hooked. At this point I wasn’t ready to invest in a hardware Kindle and I sure as hell wasn’t going to buy an iPad just to read books on. If I’d been an iphone user maybe the story would have been different.
2) Range of available titles.
Check. A specific book I really wanted was available, the fact that they had that title it was pushed me past my reluctance to spend money.
3) Synch between different devices.
Nope. I really don’t use it. Don’t get me wrong, I’m glad it’s there, but it played no part in my decision to buy or continue to buy Kindle ebooks.
There is also another aspect of the Kindle store that wasn’t mentioned that I think is very important. Amazon believe in making it as easy as possible for you to give them money. UK credit cards have always worked in the amazon.com store, which is where I first bought Kindle ebooks from. When the UK store became supported in the Android Kindle app Amazon made it very easy to transfer your account from the US store to the UK store. This has never caused a problem and all the books I bought from the US Kindle store still work just fine. My Kindle has never warned me about the maximum number of Kindles I can connect to my Kindle account before I become de-authorised.
I always get that feeling that Amazon is more interested in selling you stuff. Whereas Apple is interested in selling you things; the stuff is just there to entice you to buy the things that the stuff runs on.
Intelligence² Nuclear Debate – It’s Got To Be Nuclear
I attended the recent Intelligence² debate – It’s Got To Be Nuclear – held at the Royal Geographical Society in Kensington. You can listen to the full audio of the debate and subsequent Q&A session at the link above.
The format was setup for yet another pointless debate between advocates for Nuclear and those for Renewables. I’ll get really excited on the day the hold the debate entitled “Clean Coal: Naive Optimism or Marketing Scam”. Even a poorly framed debate can produce some interesting points so I went along anyway.
After Tony Curzon Price had finished up the introductions, proceedings were opened with a statement by Mark Lynas. You can read the whole thing on Mark’s site. The basic thrust of his argument was that the risks of nuclear accidents have been largely over-stated and not put into context with the risks of other energy sources. He also made the point that this shouldn’t be a choice between renewables and nuclear. We will need both if we are to successfully tackle climate change.
Next up was Craig Bennett from Friends of the Earth. He started off by claiming that pro-nuclear advocates frame the debate as being a choice between nuclear power or climate change. Bennett then brought forth a large stack of reports that he claimed proved that we don’t need nuclear to meet our climate change goals and proceeded to drop them one after the other onto the bench as a rhetorical flourish. The problems of intermittency were glossed over with assertion that smart grids would solve everything (apparently by using electric cars as grid storage). He conflated fuel storage for conventional power sources with energy storage for dealing with renewable intermittency. To continue in the vein he asserted that energy efficiency could make up a big part of our energy production. Bennett then moved on from the “we don’t need nuclear” part of his argument to “nuclear is bad”. Apparently nuclear diverts attention and resources away from renewables and energy efficiency. Exactly how this happens wasn’t clear. He also made some jingoistic assertions about nuclear and the need for imports. I will confess I must have missed the burgeoning indigenous solar panel and wind turbine manufacturing industry. To round things up Bennet characterised nuclear as “old-fashioned” technology and linked it to nuclear weapons proliferation. In this entire section the only thing he said that struck me as plausible was the claim that the costs of nuclear power have not come down in 50 years.
The pro-nuclear response was given by Malcolm Grimston a visiting researcher at Imperial College. Grimston spent most of his time directly rebutting Bennett’s statement. He drove home the point that most of the growth in energy demand will be in the developing world where energy efficiency won’t make much of a difference. He also pointed out that 7/8ths of the world’s traded energy is from fossil fuels. Any sensible policy needs to deal with how to remove that.
Grimston also took on Bennett’s assertions about the intermittancy of wind. He pointed out that it is not unusual to see week long periods in the UK where wind production is below 1% because of large-scale weather patterns. This is what is meant by intermittancy, there are times when for external reasons an entire energy source will be unavailable. On thus subject of efficiency Grimston pointed out that energy production has massively increased in efficiency over the course of the 20th century and hadn’t resulted in a decrease in fuel use. He mentioned that the explanation for this was Jevons Paradox.
Commenting on the safety aspects of Fukushima, he mentioned that all the nuclear plants newer than Daiichi units 1-3 had survived both the earthquake and tsunami intact.
The final statement was made by Tom Burke of E3G who, it later turned out, used to share an office with Malcolm Grimston at Imperial. Burke followed Bennett’s lead by characterising the pro-nuclear argument as nuclear or nothing. Despite Lynas having started out by explicitly stating that we need both nuclear and renewables. He followed this up by asserting that the majority of environmentalist are anti-nuclear and they can’t all be wrong. Which is the straightest example of argumentum ad populum I’ve heard in a while.
This brings us to the saddest spectacle of the evening in which Tom Burke shouted at Mark Lynas for having been mean to him in an LA Times article. During this display Burke also accused Lynas of not being a real environmentalist as he hadn’t ever worked for a real environmental group. Burke seemed surprised when this didn’t go over well with the audience.
He moved onto safer ground citing a £200 billion cleanup cost for Fukushima and linking nuclear power with nuclear weapons proliferation. Asserting that if a country has no civilian nuclear facilities it is very easy to tell if they are developing the bomb. Burke also made an argument that Nuclear couldn’t be built fast enough to meet our needs. He asserted that 50GW of wind had been built globally last year against 1GW of nuclear. He also cited the need to build 260 nuclear plants over the next 20 years just to replace the plants currently at the end of their service lives.
Which brings us to the Q&A session.
Things started off with a strident anti-nuclear activist who would clearly have rather been on the panel than in the audience. Despite protesting that she would be concise she went on and on about a study linking nuclear power-plants to childhood leukaemia. This is the study she was referencing. The authors themselves say that the link is unlikely to be caused by radiation.
Another person pointed out that renewables only get built because of the available subsidies.
A question was asked about whether Carbon Capture and Storage (CCS) should be pursued.
Tom Burke replied that nuclear receives much greater subsidies than renewables. He was also of the opinion that energy generation is so important that governments should be subsidising methods they prefer.
Mark Lynas was of the opinion that no large scale CCS had yet been shown to work and that unlike nuclear waste CO2 has no half-life so it must be stored forever. That being said he was also of the opinion that if it could be shown to work it might still be a good idea in the short term. At this point Lynas asked Bennett if it was true that Friends of the Earth (FoE) supported research into Thorium reactors.
Bennett replied that this was true and that FoE supported research into a lot of technologies that are a long way off like Fusion. This makes it sound like FoE only suppport nuclear technologies if it believes they won’t be deployed soon enough to cause it ideological problems with it’s supporters. However I may be reading more into his reply than was actually there.
Bennett also supported CCS. He said that we were going to need it to deal with the very large amount of coal-fired power stations in China.
A question was asked about the CO2 impact of Uranium mining.
The venerable Mayer Hillman asked a question about the peak CO2 concentration in the atmosphere in a fully nuclear world.
A student asked about the impact of water usage by nuclear plants especially where water resources are becoming constrained.
Mark Lynas in response to Mayer Hillman conceded that nuclear was not enough to reach a safe level of CO2.
Another questioner made an interesting assertion as to the negative economic and social consequences of a centralised power system. I think his case was that this made nuclear bad since it is more centralised. In the short time he had he was not able to expand on this thought.
The last question came from a Sustainable Development student who asked about how we should get investment made into into both nuclear and renewables. Her point was that this is difficult since markets are not rational and both sides of the debate are demonising each other.
The final answer came from Bennett in response to Lynas. Bennett admitted that FoE was broadly in support of the shutting down of 7 nuclear reactors by the German government despite the large amounts of extra CO2 it would generate.
I honestly felt that the questions were far more interesting than most of the answers. The problem with debates is that they mostly aren’t conducive to a real investigation of the issues and can very easily descend into sound-bite tennis. There were some interesting points made on both sides, but I felt that Burke and Bennett had more tendency to resort to rhetorical tactics rather than attempt a proper explanation of the position. Which of course doesn’t mean that they are wrong it just means I found them less convincing.
A vote on the motion was taken before and after the debate.
| Position | Before | After |
|---|---|---|
| For | 128 | 165 |
| Against | 56 | 63 |
| Undecided | 68 | 15 |
Which looks to me like no-one who entered the room with a position changed their mind.
Intelligence² Debate – It’s Got To Be Nuclear – Initial Thoughts
I’ve just got back from the debate held by Intelligence² at the Royal Geographical Society in South Kensington.
The motion was simply – It’s got to be nuclear – although both sides agreed that the pro-nuclear camp were clear that they wanted both nuclear and renewables.
The pro arguments were pretty standard
* climate change is such a threat that we need all the tools available
* nuclear is not the threat it has been made out to be
* nuclear is the only power source that can make a dent in coal
* renewables (wind,wave,solar,tidal) can’t do base load
And the anti arguments boiled down to a few you may well have heard before
* nuclear is too expensive
* we can make do with efficiency and renewables
* nuclear vs renewables is a zero-zum game
I found both Mark Lynas and Malcolm Grimston to be entertaining and cogent. I haven’t had the pleasure of hearing Grimston before and was very impressed with his performance. He comes across as being both in command of the facts and genuinely likeable.
The part of the debate the will doubtless gain the most attention is Tom Burke’s shouty, hissy fit at Mark Lynas. In my experience accusing your opponents of being mean to you is never a good tactic. The boos from the audience would suggest that I’m not the only one that felt that.
I am in need of both food and sleep so I’ll leave you with the final vote:
For : 165
Against : 63
Undecided : 15
I’ll write us something more substantive tomorrow when I’ve had time to reflect on the actual arguments that were made rather than the superficialities.
More information at:
http://www.intelligencesquared.com/events/nuclear
Unix Server Reboot Controversy
Paul Venezia has been getting a certain amount of flack for suggesting that rebooting Unix boxes is an inherently bad thing. I mostly agree with him.
People have been pointing out the value of regular reboots as part of maintenance. Paul maintains that any bugs that get shaken out by a regular reboot are merely evidence of an insufficiently well managed configuration. I see a lack of reboots as evidence of an insufficiently well tested configuration. If you want to be sure that all your service startup and shutdowns are in the right order through a full reboot, the best way to test it is by doing a reboot. At that point you need never reboot your box again provided you are also in the habit of never changing its configuration. Clearly there is a value judgement to be made here. Not all changes to a system will have an impact on its startup. But, modern systems are complex with a lot of interdependencies and humans are imperfect creatures. A scheduled reboot is a small amount of managed downtime to double-check that you got things right in the hope of staving off a longer period of unmanaged downtime at some point in the future.
The other thing that often happens at reboot time is hardware failure. This is particularly the case with ECC memory modules exceeding their error thresholds. But to a lesser extent you see that same thing with hard disks and power supplies. It’s much nicer to be able to call up your vendor for parts during working hours than the middle of the night. This behaviour depends on how much your servers resemble big iron. As a server’s irony is embiggened it is much more likely to tell you things are going wrong, and to let you replace parts while still up and running.
The obvious point that I’ve failed to make so far is that this is only the case if rebooting a box is not the same thing as a service outage. If you have one solitary mail server with no failover then rebooting that box will take out you mail service for however long the reboot takes. In this case I would understand perfectly well if you did’t want to reboot it once a month when the chance of it suffering hardware failure in any given three year period is actually pretty small. Although I would still caution that finding out about the flaky PSU when you get a power cut at three AM is less favourable than finding the same thing at eight AM on a Thursday during your scheduled reboot.
I briefly mentioned failover. This is probably the reason most larger systems do scheduled reboots. If you have gone to the time and expense of installing complicated hardware and software failover systems you really have to test them with some regularity. Regular reboots and failover from one side of an HA system to the other are a sensible part of any such testing.
If you have a small number of single machines running lone services then regular reboots of your servers may be positively harmful to your service uptime. If you have a large fleet of machines running clustered services then the concept regular reboots is almost certainly beneficial. Deciding where you are on this spectrum is the tricky bit. As ever it’s a weighing up of costs and benefits against a background of not entirely quantifiable risks.
All that being said I believe Paul’s main beef was with the people who reboot as an initial fix for any mishap; Yes junior MCSE, I’m looking at you. Obviously, if your first response to any service outage is to hit the reset button then there is something wrong with you and you don’t belong anywhere near any IT system.